Bev's Tip Jar - Thanks for your support!

This is my Tip Jar. If you enjoy reading this blog and would like to support my cooking, eating and writing habit this is how to do that. Thanks for your support!
Showing posts with label maple syrup boiling method Pennsylvania. Show all posts

Friday, March 2, 2012

Moonshine Maple Rum - Is It Worth The Effort?

     Because of the circles I travel in it has come to my attention that it is possible to make Rum, and alcoholic beverage, from maple syrup. There is a person whom I have heard of, who happens to make moonshine on occasion, actually on many occasions. He’s very good at it.
     He’s put a great deal of time and effort into his craft. He studies books and has a fine aptitude for math as well as for making machines - things that do things.
     After the experience of making some really good moonshine whiskey using a variety of different edibles, he spent one late winter tapping trees to make maple syrup. He had great success making syrup so the following winter he moved on to try his hand at making Rum. Whiskey, the most common form of moonshine, is made from grain. Rum is the alcoholic beverage that is made from sugar. Maple syrup is a sugar. So he made Rum.
     It takes 40 gallons of maple sap to make one gallon of syrup. He used two gallons of syrup for his Rum run. That means he had to collect 80 gallons of sap from the trees around his hollow. I know for a fact that last winter was a rough one here and there were many days he couldn’t get up the mountain to collect sap from his taps. But he got enough.
     He used two 6 gallon fermenting buckets and dumped a gallon of syrup into each bucket. To each bucket he added 4 gallons of raw sap. Normally, if using a grain mash, plain water would have been added. Sap is mostly water but he wanted to make sure he retained the flavor of the maple for his Rum. So this is what he did.
     Mind you, he had to boil down those 80 gallons of sap to make the two gallons of syrup. This man is driven when he’s onto an idea. Into each bucket of “wash” he tossed a bread yeast specifically made for fermenting. Then he capped the buckets and let the wash do it’s thing - ferment. After it was sufficiently fermented and the alcohol had been created, he ran it through his still.
     He netted 2 liters of 160 proof Rum. Rum that strong would burn your insides out, so this high proof result is generally cut with water to make it drinkable and pleasant. He cut it down to about 90 proof, pretty much what you buy in a bottle of Rum from the liquor store.
He doesn’t have any wooden casks in which to age his moonshine products. Instead, he chars small chunks of wood from the trees from his own land and he adds some of this to the alcohol. He charred maple wood with his propane torch and added these to the bottles of Rum. He let it age for a month or two before removing them.
     So would he do this again? Was it worth it? Although the Rum was tasty, in his opinion it didn’t quite have the maple taste that he thought it would have. There is a really specific taste to maple syrup that is almost poetic. It’s hard to describe - woody, fruity with a hint of vanilla - a one of a kind flavor. He did add some maple syrup to one bottle which technically made that a “cordial,” not a Rum. It was still good. He said he took two bottles to a party and they were drained in a flash.
     There was a lot of work involved in making the maple Rum from the ground up so to say but the final result could have been attained by just adding some good strong maple syrup or maple extract to grain alcohol for maple taste with a kick. As well as I can tell, he’s decided to continue making moonshine, but with grains or fruits, not sap. He’ll save the syrup for pancakes.

Tuesday, February 28, 2012

A Photo Essay of Sap to Syrup


This is the big kettle used for gathering sap.  Although the top of the Harmon (made in Pennsylvania, USA!) Pellet Stove does not get hot enough to boil the sap, it does heat it up nicely.  Those skulls are from some of the deer I've shot.  The picture of the dog is a painting I did.

I use one of these reusuable coffee filters to strain the sap that is poured from the jugs into the collection kettle.  It strains out flies, bugs, ants, and moths all of which like to drink sap.  It doens't work for filtering the minerals from the syrup, however.  For that you'd use wool.
The warmed sap is then added to the boiling sap on the stovetop.  As it boils down a couple of inches, I add more.  It takes about an hour to boil a gallon of sap to syrup this way.  I gathered three gallons yesterday.  Do the math.
Once all the sap has been added to the stovetop kettle and has started to turn to syrup, it needs to be watched constantly.  This still takes some time, so then I sit on the kitchen counter and play my banjo.  I try not to get too involved with the song in case of a boil over.


Monday, February 27, 2012

Sap is Running at Full Drip!

     Last night went to below frost and today the temperature hit 50 F easy.  Sure enough, the trees are running like crazy.  I have eight taps in trees down by the creek and usually go in the late afternoon to gather sap.  I bring a large 30 quart kettle with me so have to haul the day's take up to the house.  Today that kettle was full!  I had to stop several times to rest and give my arms a break.  But there it is now, boiling and bubbling away.  I'm thinking we'll get about 2/3 of a pint from this today's yield of sap.
     So far, there are two quarts of syrup in the refrigerator.  Maybe a little less than that, because we've been eating some.
     The first quart is a medium amber color, not quite as light as the first quart from 2011.  Maple syrup is graded by color and I'm wondering if I missed the golden amber opportunity of tapping this year.  The winter has been very mild and although January seemed like the right weather, it was still early by the calendar.  Whatever.  Back to syrup...  The lighter in color, the higher the grade.  The lightest is called Grade A.  They say that the lighter syrup is also sweeter, but I don't notice much of a difference in sweetness.  As the syrup gets darker, the flavor also gets stronger.  I happen to like a full flavor, really mapley tasting syrup with a bit of the wild in it. 
     It is time to stop tapping a tree when the tree buds and the buds start to crack open.  At that point the syrup has a little too much woody taste to it (it's called "buddy") and doesn't taste as good as a full flavor medium amber syrup.
     By the way, if you've been following this blog, the syrup that I had overcooked and had all that sugar in the bottom half of the jar was successfully reconstituted into syrup!  I spooned the sugar into the boiling sap last night.  It dissolved and this time I didn't boil it quite so long.  I still can't read that thermometer worth a tinker's damn though, and also wonder if it's giving me a true reading.  I'm still going by size and amount of bubbles for figuring when to take it off the stove.
     PS  Had steel ground oats with maple syrup and butter for breakfast.  Yo, Boomers - d'ya remember MAYPO?

     Here is a link that will help all you budding sugar people to predict maple sap flow.  It's very helpful.
http://www.goshen.edu/merrylea/sugar/flodict.htm
    

Friday, February 24, 2012

Slow day for Sap and Sugar Crystals in the Jar

     It did not go down to freezing last night.  Today hung in the high forties with a misty rain.  Very slow sap day.  I maybe got a quart of sap from six trees.  No matter, boiled it down anyways and added yesterdays partially boiled down three gallon take to it.  I netted about a cup of syrup.
     However, and this disturbs me, there is a lot of maple sugar at the bottom of the second quart jar I have.  I thought it was just minerals that precipitated out, but when I took the jar out of the refrigerator and took a good look at it, I realized it was sugar!  Not a disaster, mind you, sugar can be reconstituted into syrup.  But I just don't know where I went wrong.  Maybe boiled it a tad too long. 
     Professionals and people who rely on what pros say and do, take the temperature of the syrup as it boils.  When it hits 219 F degrees, it is taken off the stove.  I have tried using a candy thermometer, but find that it is hard for me to read.  The steam gets on the glass and as soon as I take it out so that I can read it, the temp starts to drop so I don't get a true reading.  Also, when there is only an inch of syrup in the bottom of the pan it's hard to keep the bottom of the thermometer off the metal.  This is why I have been relying on the bubble method of telling when it is ready as well as relying on when looks like syrup, feels like syrup (on my tongue,) smells like syrup, and tastes likes syrup - then it is a duck!  Just kidding.  Therefore, it must be syrup.
     I'll reconstitute the sugar this weekend.  So far, the first quart looks fine.  It's a nice amber color. Nice and clear.  Minerals at the bottom of the jar.
     We have a cold front coming in tonight.  I'm curious to see how the trees will react to this.  I really like my trees.   

Wednesday, February 22, 2012

Pancake Tuesday!

     Some call it Mardi Gras, Some call it Fat Tuesday, some call it Fasnacht, but at home in upstate New York, when I was a kid we called it Pancake Tuesday.  As part of a Lenten tradition the day before Ash Wednesday was a day of feasting.  It was also the day we got to have breakfast for supper!  Pancakes!  Sometimes with sausages; sometimes with bacon.
     As the mother of seven kids, Mom spent a lot of time at the stove that evening flipping pancakes while we sat at the kitchen table and gobbled them up.  Butter.  Sour cream in big globs.  And Maple syrup poured in great streams onto pancake after pancake.  We were hungry kids!
     My Dad tapped our great big maple tree - the one in the backyard, the oldest tree in town - and netted just enough maple syrup for our feast.  He would stay up all night while it boiled to a syrup on our kitchen stove.  Our windows would be covered in steam.  The cupboard doors would warp and the ceiling tiles would arch.  So what?  It was sugar time!
     It occurs to me that one of the reasons why the people of upstate New York call Shrove Tuesday, "Pancake Tuesday," is because that is the season of maple syrup - sugar! - and a most welcome feast for the people of the north country who still have a ways to go before spring.

Here's my recipe for homemade pancakes (I never use a mix - not even Bisquik)
1 C flour
3 T fat of some sort (Lard, butter, oil...)
3 t baking powder
1/2 t salt
1 fresh egg from a happy chicken
1 C milk.
Blend flour, baking powder and salt.  Cut in fat.  Add egg and milk.  Stir but not too much.  You want it lumpy.  Fry in a fairly hot frying pan that has been greased with fat (I use bacon drippings)

Great day to do the wash AND boil sap!

     The temperature is going into the fifties today and there is a stiff breeze blowing.  It's a great day to do the wash and hang it outside to dry.
     I plugged up the silver maple that is in our front yard because it has budded.  This particular maple tree always buds early.  Its sap now smells woody.  Time for me to quit pestering that tree and let it do its thing and let it get on to leafing out.  However, the sugar maples that are down by the creek generally bud late, not for a couple weeks yet as long as cold nights hold out for a spell.  I tapped three more trees down there and already the jugs each have about a quart of sap in them.
     I will be boiling sap again tonight (already boiled down two gallons this morning) as well as working on re-writes of my novel.  Oh, I'll also be folding laundry.
     So far I have a quart and a half of syrup in the refrigerator. 

Thursday, February 16, 2012

A Watched Pot Does Indeed Boil!

     When I boil down sap for maple syrup I boil it in my kitchen on my stove top.  I use a heavy weight stainless steel six quart dutch oven.  I set the burner at high till it starts to boil, then turn the heat back just a bit to medium high.  As the water boils off, I add more sap from a large kettle that sets on top of the pellet stove in our kitchen.  This doesn't boil the sap.  It just heats it, takes the chill off of it.
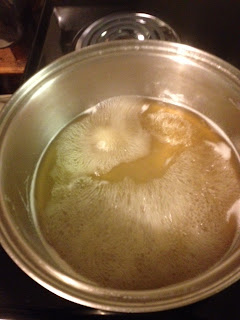
     At first the sap boils rapidly and with pretty big bubbles.  It looks like water boiling.

As the sap boils down, more sugar to water than what it started out as, the bubbles start to get smaller. It also starts to taste sweeter.

     I've never used a candy thermometer when boiling down sap for syrup.  I suppose I could but I can't be bothered with that.  I do this the same as my father did back when I was a kid growing up in upstate New York and he would tap our maple tree to make syrup.  All that sap boiling and steam in the kitchen used to warp our cupboard doors and coat the windows.  I crack a window near the stove so that helps out some.  But be prepared for a steamy kitchen.  Also, don't run off and think you have time to go get involved in something else, something that will take you too far from the kitchen.  You need to keep an eye on the sap as it starts to boil down.
     After I have used up all the sap from the big pot on the pellet stove, the sap on the kitchen stove starts to boil down in earnest.  All this time I have been skimming off the foam that collects near the sides of the pan.  These are minerals, etc.  No reason to keep all that foam there.
     Soon enough the bubbles on the top of the sap start to group up and foam toward the middle of the pot.  Taste it again.  It tastes even sweeter!  Careful you don't burn your tongue.  At this point I watch the pot very carefully.  Sap, as soon as it hits that critical temperature when it turns from watery sweet stuff to syrup, can get away from you really quickly.  I cut the heat back just a bit.  The bubbles go back to bigger.  When they get smaller again, I cut back the heat just a little more.  Taste it again.  I watch how it hangs on the spoon.  If it coats the spoon and drips off slowly in big drops I pronounce it done.  I remove the pot from the burner, let it cool down just enough so I can taste it without burning my tongue, then pour it off into a Mason jar that has been filled with hot water (pour that water out) and sitting on the kitchen counter.
     Next day, same thing and I add the new syrup to the old syrup.  If there is a day when I will not get so much syrup out of what had been gathered and to boil it down to syrup stage would have left too little in the pot to control the boiling, I don't boil it down to syrup, but save the partway stuff off in a jar and add that to the next day's batch.
     This method of pot watching has worked out for me for quite a few years.