Bev's Tip Jar - Thanks for your support!

This is my Tip Jar. If you enjoy reading this blog and would like to support my cooking, eating and writing habit this is how to do that. Thanks for your support!

Wednesday, May 30, 2012

Planting Potatoes and How to Get Rid of Warts

     Yesterday I pulled mile high weeds from the eastside of the garden. I have two sections. One section is for plants that like limey soil (Westside). The other is for plants that like acidic soil (Eastside). I don’t know what potatoes like but this was the only space I had left. On the other hand, they are right next to the Jerusalem artichokes which are also a root vegetable, so maybe they’ll be happy.
     I planted red potatoes that I got from Aldi’s - a grocery store. They had bags of 10 seed potatoes for $.79. Pretty good deal. Some years back I bought some of Aldi’s Ever-bearing Red Raspberry plants. They are doing great. They also like acidic soil. I mulch them with bags of wood pellets that have gotten moisture in them and can’t be used in the stove. Sawdust makes a soil acidic.
     It was hotter than blue blazes outside yesterday and with all the rain we’ve been getting the weeds are about four or five feet high. There is a lot of golden rod and ox eye daisies. I pulled and pulled and cleared an area out. Then dug and dug and got a patch about 7’ x 7’ cleared and put in 10 hills of potatoes. About 18” apart. Once they sprout, I’ll mulch them with straw to keep the spud itself from turning green.
In years past I had planted potatoes but always had a problem with Japanese Beetles eating the leaves. Curiously, I haven’t seen any Japanese Beetles in our yard for about three years now. I don’t know where they’ve gone or why they’re not around. I don’t know if this is a good thing or not. I haven’t seen many mud dauber wasps either. We used to have lots of them around.
     I figured it might be a good time to try growing potatoes again on account of the lack of Japanese Beetles. Also, we’re planning on having a rabbit hunt here come fall and small game season and I think freshly dug red potatoes would taste good with rabbit roasted on the grill!

     There is a folk cure for warts that I have used and find that for the most part it works. If you have a wart you must rub it with a potato that’s been cut in half under the light of the full moon, then bury the potato under a drip of a water spigot. If the potato sprouts, your wart will remain. If the potato doesn’t sprout, the wart will go away.
     Here’s my theory: On the bag of the seed potatoes as well as on the Internet under How To Grow Potatoes, it is suggested that only seed potatoes be planted. It says that regular grocery store potatoes may not grow on account of stuff that is put on them to keep the potato from sprouting. I figure it’s this stuff that kills warts. So if the potato doesn’t sprout, it’s been sprinkled with this stuff. If it does sprout, it hasn’t.  Only use a grocery store potato that hasn't sprouted on your warts.
     I don’t know what the full moon has to do with any of this, except that it sounds good.

Monday, April 9, 2012

Behold! The Extremely Tasty Dandelion Blossom!

     Once you have tried this recipe you will never again run off to the hardware store for a bag of Scott’s Dandelion killer. You will also realize how short the dandelion season actually is. It only lasts about three weeks with a short spell come September with its cool rains.
     When I lived up north, north of Pennsylvania in upstate New York, the Italian ladies would gather dandelion leaves, sauté them with olive oil and garlic, then marinate them in a blend of seasonings and vinegar. They’d pack them in a jar in the refrigerator and serve them as garnishes.
     I moved south(ward) to Pennsylvania and found that the people around here gather the same leaves, douse them with hot vinegar and bacon dressing, or throw them into a ham soup and eat them that way.
However, and I got this out of a Native American Cookbook I picked up at the Rez many years ago, the blossom itself can also be eaten. Who would think?
     I tried this recipe when my kids were very young and not into vegetables. At a point, as kids are growing up, they become suspicious of anything green or orange when it comes to eating. This suspicion is common among children. Supposedly, it helps them learn what is safe and what isn’t.  Until they see other people (like parents) eating orange and green things a great many times and not keeling over, they stay away from vegetables.
     However, the night I served dandelion blossom, breaded and fried - they gobbled them up! No questions asked. No suspicious glances in our direction wondering if we were going to fall off our chairs writhing in pain. They just ate them. And asked for more. Whoa! I thought. Are we evolved from cows? Rabbits? Dandelion greens and blossoms are loaded with vitamins and supposedly (and I did look this up many years ago) you can eat a LOT of blossom and not get sick. You can’t overload. We figure about a dozen to a serving. So here goes:

     Fried Dandelion Blossom

-Gather dandelion flower heads preferably away from the road.

-Set out two bowls - one with one egg and one tablespoon of water added, mixed in.

-Set out another bowl with anything for breading: flour with salt and pepper, Italian style bread crumbs and some flour, flour, bread crumbs - doesn’t matter. Whatever you have.

-Rinse the colander full of blossom in water. Not because they are necessarily dirty, but I found that the water helps them steam soft within the breading. Otherwise they have a fuzzy texture to the tongue which I don’t find pleasant.

-Dip the flattened out blossom in the egg.

-Flatten out the blossom and dip it into the breading mixture.

-Fry in oil, olive oil, butter and oil - whatever - till golden brown on the blossom side then flip and let it fry some on the stem side.

-That’s it!

     Sometimes I add chopped chives or spring onion, both of which come up around the same time as do the blossoms blossom.
     I have to admit, I get a kick out of Scott’s Lawn Care ads that show up on TV and in newspaper flyers and show a suburban homeowner so distressed over all those damn dandelions on the lawn. So Scott’s says “Use this and it will kill them all!” Right. For all I know they could be sprinkling the lawn with flour because dandelion blossoms only bloom for about three weeks in the spring when the weather is cool and rainy. Sprinkle your lawn with The Dandelion Killer and sure, they'll disappear - they’ll be gone in a couple of weeks anyway.  To everything there is a season.

     But I will tell you this for a brass fact, once you start frying up the blossom you’ll be sorry to see them go. They’re blooming now! Go get ’em!

PS - I'll lay a dime to dollar that a bunch of Scott's Lawn Care ads show up on this page and will tell you to contact them if you have a dandelion problem.  Go ahead - contact them - and give them this recipe.  Maybe next year they'll be telling us how to grow dandelions.

PPS - Because the dandelion season is so short it is possible to bread them and freeze them for later.  Just lay them out on a paper towel on a cookie sheet and set them in the freezer.  Once frozen, dump them into a freezer bag.  They taste just as good as fresh when fried and actually make for easy cooking this way.  I wonder when we'll see them at the grocery store done up like this. 

Monday, April 2, 2012

An Experiment in Growing Garlic

     Every year that I have planted tomatoes I’ve made spaghetti sauce and either canned or frozen it. Over the years, as I became a better gardener, more and more homegrown elements such as onions, chives, green peppers, oregano, basil, and parsley were added to the sauce. Last summer as I pealed, chopped, grinded and minced, I realized that the only element that was store bought (other than the olive oil) was the garlic! This year I am going to try to grow garlic.
     Ideally garlic should be planted in the fall or at least very early spring. I planted the garlic cloves last November.
     Find a nice sunny spot in your garden that is not too damp. Garlic likes dry weather and soil. To grow garlic dig up a strip of garden about a foot deep. Get some garlic from the grocery store and break it apart into cloves. Plant each clove about 1” to 2” deep under the surface, pointy side up. Set the cloves about 4” apart with rows about 18” apart. I think mine are a foot apart but it’s too late now to move them. Mulch with straw. Then let it go.
I mulched mine in the fall with straw from the chicken coop.  It had chicken droppings in it.   The garlic sprouts were about 4” high this February because of our mild winter. It got really cold some nights but that didn’t seem to hurt the sprouts.
     Now the weather is warming up so I have cleaned off the garlic bed and fertilized it with liquid manure. Garlic likes a slightly acidic soil so for the summer mulch I used wood pellets. We have a pellet stove and every now and then we open a bag and find that moisture has gotten into the pellets and they can’t be used in the stove. I use these pellets to mulch areas of the yard and garden that like acid soil.  For instance, the red raspberry bedd likes an acidic soil, so that is mulched with wood pellets.
     So there you have it! The garlic is now taking off. It’s about a foot high and fertilized and mulched. As it grows you're supposed to clip off the flower stem that may emerge.  This aids in adding strength to the root, the bulb, which is the part you eat.  I’ll see how it goes and keep you posted.

Friday, March 16, 2012

Seasonal Food from Eating with Bev: How to Seal a Maple Tree Tap Hole

Seasonal Food from Eating with Bev: How to Seal a Maple Tree Tap Hole:       The daytime temperature has climbed into the 70's and the nighttime temperatures are now hanging in the 50's. It's unseasonably warm ...

How to Seal a Maple Tree Tap Hole


     The daytime temperature has climbed into the 70's and the nighttime temperatures are now hanging in the 50's. It's unseasonably warm and this weather will stay with us for the next couple weeks - maybe longer! All of our maple trees have budded and they are no longer dripping sap. They are busy growing out their leaves now. It is important to seal the holes that were drilled into the trees otherwise bugs and disease can get into the tree and kill it. We can't let that happen.
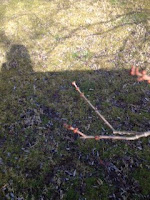
     The best way to close up a tap hole in a maple tree is to find a maple twig that is about the same size as the hole drilled. You could run to the hardware store and get a bunch of dowel rods to cut up, but twigs are nature's dowels and they are conveniently located right near the tree's that you've tapped! Cut off a piece of twig about four inches long and pound it into the hole. Remember, the hole was drilled about 2" deep so about 2" of twig will poke out. If you find that the twig you cut is too thin (loose) use a piece from further up the twig branch. Nature provides us with tapered twigs, so soon enough you'll find a piece that fits snuggly. It can be somewhat forced into the tap hole by using a hammer. If it's too big, just find another piece or try turning it around.
     Because I use a nail in the tree on which to hang the jug, I also plug the nail hole with a small piece of twig. The tree will heal over and next year you'll find that the tap hole is sealed. You won't be able to remove the twig that was used to seal the hole. Nature is marvelous. Your trees will thank you for treating them well and with consideration. Next year, just find a different spot to drill.
     One way to tell if a tree is ready to be sealed is to look at the color of the sap in the jug. This is also one reason why I prefer to use plastic water jugs for home tapping. It's much easier to see #1 how much sap you got and also if it's clear or starting to turn dark amber in color. Once it turns dark amber there won't be as much sugar in the sap and it will not taste very good. It will taste woody or "buddy."

Monday, March 12, 2012


     The old meat grinder raised some eyebrows today when I took it out to Hilsher's General Store for advice. One, I needed to get a set of the right size stuffing tubes so to make sausages at some point and two, I wanted to get the blades sharpened or replaced.
     Dick Hilsher saw me wandering around the store carrying this heavier-than-lead meat grinder and asked if I needed help. He is usually there and is very helpful answering questions and finding you the right parts to get most projects underway.
     "Hm! Do you know what you have here?" Well, an old meat grinder. He asked me how long I'd had it and I said, "Couple days." Then he pointed to the patent date on it - 1909 - and told me all about the company in that used to make such meat grinders. Landers, Frary and Clark out of New Britain, Connecticut. It's a nice heavy duty Universal Meat Chopper. Cast iron. Still works but needed some attention.
     He brought me over to the display case of grinding blades and parts. "It's locked," he said. "The only thing around here that I do lock up." The blades were not cheap but not horribly expensive either. He had me feel a new blade and compare it to the feel of the blade on my meat grinder. There was a noticeable difference in sharpness. I would have bought a new set of blades - cutter which looks like a small propeller and grinding plate - a disk full of holes - but because my meat grinder is so old, the "square" hole of the new ones would not fit on the "rectangular" shaft of my old one.
     So we sent both blade and grinding plate off to the shop to be sharpened. He said when they get back they should be sharp enough to last me the rest of my life. (I'm not sure how much longer that will be, but it's good to know.)
    
     On Saturday Greg and I went up to Lewisburg, PA to the Dale Walker Engle House to see a demonstration on how to make sausage. They had a guy up there showing how to make maple syrup as well, but I pretty much know how to do that. The sausage demonstration was worthwhile. I got to ask lots of questions and as well learned how to do it.
     Questions: What's that gadget? That's the thing that keeps the auger centered when the blade is taken off and the sausage tubes added. Why do they say on the Internet to soak the casings in water? To make the stuffing go through more easily. Why do they say on the Internet to let the sausages rest for a day? To help set the filling. Should I use soy flour in the mix? Only for bologna. Where did those casings come from? A pig. What about for smaller link sausages, like breakfast sausage? A lamb. How about...? A steer. I didn't ask him if I could recycle gut fiddle strings for casings. That might have been out of his range of knowledge.
They added a mix of salt and pepper - about a 1 to 1 ratio and I'd guess about a 1/2 cup of each to about 10 pounds of meat. He said to only use good grade pork for pork sausage, a decent shoulder.
    
     While at Hilsher's I picked up a pound or so of spring onion sets and a package of Snow Pea seeds. It's that time of year. Yesterday I realized that the little green plants in the cold frame I'd set up in the fall are not lettuce plants, but weeds. I'll be replanting lettuce seeds today and try to get some chicken manure from the coop onto the garden. Tomorrow I'll be planting onions.
     They always say around here to get your peas planted by St. Patrick's Day which is this Saturday. Twenty years ago I used to try to do that but March would be so cold and snowy as well as the first half of April that the seeds would just rot. So we'd replant. Then May would get so warm that that the plants would be over before they started. Never any success with planting peas by St. Pat's Day. However, because of the mild weather we've been having I'm going to try it again this year - one more time - and see what happens.
     The grinding blades should be back in about two weeks. Just in time for Easter. Just in time for fresh kielbasa - I hope.

Wednesday, March 7, 2012

Sausages, Sap and Beer!


     Busy day yesterday. As I promised when I began this Blog I intend to write about moving through the seasons and the food of those seasons. Though it's not over yet, we are beginning to move out of maple sugar season now and into spring, albeit, slowly.
     Maple season moves us toward Easter. One of my favorite meals is the Easter family dinner. As part of our Easter tradition we usually take a trip out to Shamokin, PA where we drive by our late grandparents' old house, late aunts’ houses and finish the day by stopping into Shaw’s Meat and Deli Market. We buy kielbasa there - about twenty pounds, enough to last us for Easter dinner and the rest of the year. We would also buy City Chicken there. This is chunks of veal and pork on a skewer that you bring home, then bread and fry like chicken. We’d also buy Soupis - a hard Italian salami. This was our eastern European meat for the year, some of which we gobbled up right away, some for special dinners and some for freezing and to save for later.
     The floods of 2011 hit Shamokin, PA and the rest of central Pennsylvania pretty hard. Bad news! Shaw’s couldn’t recover their losses and closed down. Bummer! Now - where to get good kielbasa?
     I decided I would try my hand at making our own. So yesterday I went out to the Kramer Flea Market in search of a hand meat grinder with a sausage tube attachment. One of the dealers there had about a dozen hanging on the wall but when I asked the prices he started in with a song and dance about how this was hog butchering time and everybody wanted one (I doubted that because I was the only one looking at them for a good hour although the market was very busy)  When I asked him the prices on a few, he started in with another song and dance about how they were "antiques and collectable."  Since I don't necessarily want to collect meat grinders, I just want one that works, I thanked him nicely and went down to the Firehouse Flea Market in Selinsgrove. I got a decent one for $15.00, the first in my 'collection.'     Mrs. Stolfus, who takes the money at the flea market, said if I go out to Stauffer’s Meat Market (out in the hills) they’d have casings and that Hilscher’s Ace Hardware Store (deals with the farmers and Amish, etc) would have proper sausage tube attachments and anything else I needed to make sausage - kielbasa!         
     Stauffer’s makes really good cracklings and if you’re lucky and get there early on a Tuesday when they render the lard, you can get a decent sized block for $2.00. So I will, probably next week.
     So now I have a meat grinder that needs to be cleaned sitting on the kitchen table. James, our son, is home this week from NYC and I took advantage of his good and helpful nature to help me get some beer started. We make out own beer on account of James having taken up the hobby while he was in college at the school right down the road. Once you start making your own beer you get spoiled. Store bought just never quite cuts it when you can tweak a recipe to your own individual taste buds.
     A family favorite is the Shakemantle Ginger Ale recipe from BEER CAPTURED a book by Tess and Mark Szamatulski. It takes about seven weeks start to finish to make beer. We’ve done this many times now and if we get the ginger beer started now, it will be ready for just about the time to start mowing the lawn again.
     So beer boiled on the stove for a good part of the afternoon, till it was time to pour it - all five gallons - yes, you heard me right - all five gallons! into the primary fermenter. Then I went down to the creek to collect the maple sap.
     The day’s take was low, about a gallon, but that boiled down and added into the previous days’ take gave us about a pint. Today, however, was great! A good three gallons of sap. Last night went to below freezing and today up to 60F. Excellent sap drip weather. I think next week will be the end of it here for us, but so far I have just shy of a gallon of maple syrup in the refrigerator.
     I’m hoping to make the sausages using some of the venison from the deer I got in the fall. For James’ birthday dinner we had a fine, rolled rump roast of venison, marinated for several days in Merlot wine, garlic and herbs. I would tell about how I got that buck in this post, but spring is not the time to tell about how you got your buck. But as I think, just over the horizon of maple sugar season, and Easter kielbasa season, and ginger beer season is Spring Gobbler season. Let’s hope I have story to tell about that!


Sunday, March 4, 2012

Budded or Not - When to Stop Tapping Maple Trees

     This year, 2012, has been unseasonably warm for winter.  It's almost time to stop tapping the maple trees though there may be another week left from the looks of the weather.  I could kick myself around the proverbial block for not setting the taps in the trees in January.  January was ideal sugar weather - days in the fifties and night in the twenties.  I did not tap the trees, however, because there was always the risk that our winter here in the Northeast U.S. would have finally come in full force.  The trees might have stopped running and the taps holes might have started to heal over.  So I waited until mid Frebruary, the time we usually tap trees in Pennsylvania.
     So far I have three quarts of maple syrup in the refrigerator.  It will keep for a year or more if refrigerated.  We don't usually have to think about that too much, though, becauese we use it up.
     We have several varieties of maples trees on our property - some better than others for syrup, but they all drip sap and all that sap is good when boiled down.  Unfortunately, I haven't really paid attention to the types of trees we have.  This summer when the leaves are on, I'll come back and edit this post with the names of the types of maples we have.  But here is what I know on observation for how they give sap, when they bud and when it is time to pull the taps and plug the holes.
This tree on the right hand side of this article, sits in the front corner of our yard.  It's always the first to bud.  It actually started looking "nervous" in January but it always gives the sweetest sap - tastes sweet right out of the tree - so I tapped it anyway.  By March 1, 2012, the buds had started to open.  I had pulled the taps the week before.  Also, the sap it put forth was taking on an amberish tint.  When that happens I always pull the taps.  The syrup would not taste sweet then.  It would taste woody or "buddy" as the pros call it.
     The tree branch pictured at the left has just started showing some buds.  It's dripping very slowly now.  It gives a decent sap, not so sweet as the front yard tree, the one that buds early, but earlier than the trees down by the creek.  It's still running clear sap, but had slowed down considerably.  I'll probably pull the tap on this one tomorrow.
     The trees down by the creek are still dripping sap and have not budded, nor do they show signs of budding yet.  These may hold out for the rest of the week.  We still have days in the fifties predicted with cold nights.  I might be able to get another quart out of them.
     This year would have been a banner year for syrup had I tapped in January.  I feel like the calander is slipping sideways.  Maybe it's better just to stand outside, feel the air and the sun, and be more instinctive about tapping trees than to watch the calendar these days.
     Anyways, I'll be boiling some sap down tonight - I just don't know how much.


Friday, March 2, 2012

Moonshine Maple Rum - Is It Worth The Effort?

     Because of the circles I travel in it has come to my attention that it is possible to make Rum, and alcoholic beverage, from maple syrup. There is a person whom I have heard of, who happens to make moonshine on occasion, actually on many occasions. He’s very good at it.
     He’s put a great deal of time and effort into his craft. He studies books and has a fine aptitude for math as well as for making machines - things that do things.
     After the experience of making some really good moonshine whiskey using a variety of different edibles, he spent one late winter tapping trees to make maple syrup. He had great success making syrup so the following winter he moved on to try his hand at making Rum. Whiskey, the most common form of moonshine, is made from grain. Rum is the alcoholic beverage that is made from sugar. Maple syrup is a sugar. So he made Rum.
     It takes 40 gallons of maple sap to make one gallon of syrup. He used two gallons of syrup for his Rum run. That means he had to collect 80 gallons of sap from the trees around his hollow. I know for a fact that last winter was a rough one here and there were many days he couldn’t get up the mountain to collect sap from his taps. But he got enough.
     He used two 6 gallon fermenting buckets and dumped a gallon of syrup into each bucket. To each bucket he added 4 gallons of raw sap. Normally, if using a grain mash, plain water would have been added. Sap is mostly water but he wanted to make sure he retained the flavor of the maple for his Rum. So this is what he did.
     Mind you, he had to boil down those 80 gallons of sap to make the two gallons of syrup. This man is driven when he’s onto an idea. Into each bucket of “wash” he tossed a bread yeast specifically made for fermenting. Then he capped the buckets and let the wash do it’s thing - ferment. After it was sufficiently fermented and the alcohol had been created, he ran it through his still.
     He netted 2 liters of 160 proof Rum. Rum that strong would burn your insides out, so this high proof result is generally cut with water to make it drinkable and pleasant. He cut it down to about 90 proof, pretty much what you buy in a bottle of Rum from the liquor store.
He doesn’t have any wooden casks in which to age his moonshine products. Instead, he chars small chunks of wood from the trees from his own land and he adds some of this to the alcohol. He charred maple wood with his propane torch and added these to the bottles of Rum. He let it age for a month or two before removing them.
     So would he do this again? Was it worth it? Although the Rum was tasty, in his opinion it didn’t quite have the maple taste that he thought it would have. There is a really specific taste to maple syrup that is almost poetic. It’s hard to describe - woody, fruity with a hint of vanilla - a one of a kind flavor. He did add some maple syrup to one bottle which technically made that a “cordial,” not a Rum. It was still good. He said he took two bottles to a party and they were drained in a flash.
     There was a lot of work involved in making the maple Rum from the ground up so to say but the final result could have been attained by just adding some good strong maple syrup or maple extract to grain alcohol for maple taste with a kick. As well as I can tell, he’s decided to continue making moonshine, but with grains or fruits, not sap. He’ll save the syrup for pancakes.

Tuesday, February 28, 2012

A Photo Essay of Sap to Syrup


This is the big kettle used for gathering sap.  Although the top of the Harmon (made in Pennsylvania, USA!) Pellet Stove does not get hot enough to boil the sap, it does heat it up nicely.  Those skulls are from some of the deer I've shot.  The picture of the dog is a painting I did.

I use one of these reusuable coffee filters to strain the sap that is poured from the jugs into the collection kettle.  It strains out flies, bugs, ants, and moths all of which like to drink sap.  It doens't work for filtering the minerals from the syrup, however.  For that you'd use wool.
The warmed sap is then added to the boiling sap on the stovetop.  As it boils down a couple of inches, I add more.  It takes about an hour to boil a gallon of sap to syrup this way.  I gathered three gallons yesterday.  Do the math.
Once all the sap has been added to the stovetop kettle and has started to turn to syrup, it needs to be watched constantly.  This still takes some time, so then I sit on the kitchen counter and play my banjo.  I try not to get too involved with the song in case of a boil over.


Monday, February 27, 2012

Sap is Running at Full Drip!

     Last night went to below frost and today the temperature hit 50 F easy.  Sure enough, the trees are running like crazy.  I have eight taps in trees down by the creek and usually go in the late afternoon to gather sap.  I bring a large 30 quart kettle with me so have to haul the day's take up to the house.  Today that kettle was full!  I had to stop several times to rest and give my arms a break.  But there it is now, boiling and bubbling away.  I'm thinking we'll get about 2/3 of a pint from this today's yield of sap.
     So far, there are two quarts of syrup in the refrigerator.  Maybe a little less than that, because we've been eating some.
     The first quart is a medium amber color, not quite as light as the first quart from 2011.  Maple syrup is graded by color and I'm wondering if I missed the golden amber opportunity of tapping this year.  The winter has been very mild and although January seemed like the right weather, it was still early by the calendar.  Whatever.  Back to syrup...  The lighter in color, the higher the grade.  The lightest is called Grade A.  They say that the lighter syrup is also sweeter, but I don't notice much of a difference in sweetness.  As the syrup gets darker, the flavor also gets stronger.  I happen to like a full flavor, really mapley tasting syrup with a bit of the wild in it. 
     It is time to stop tapping a tree when the tree buds and the buds start to crack open.  At that point the syrup has a little too much woody taste to it (it's called "buddy") and doesn't taste as good as a full flavor medium amber syrup.
     By the way, if you've been following this blog, the syrup that I had overcooked and had all that sugar in the bottom half of the jar was successfully reconstituted into syrup!  I spooned the sugar into the boiling sap last night.  It dissolved and this time I didn't boil it quite so long.  I still can't read that thermometer worth a tinker's damn though, and also wonder if it's giving me a true reading.  I'm still going by size and amount of bubbles for figuring when to take it off the stove.
     PS  Had steel ground oats with maple syrup and butter for breakfast.  Yo, Boomers - d'ya remember MAYPO?

     Here is a link that will help all you budding sugar people to predict maple sap flow.  It's very helpful.
http://www.goshen.edu/merrylea/sugar/flodict.htm
    

Sunday, February 26, 2012

Sap's Running Once Again

     Friday, the weather turned from cloudy, misty to cold and windy.  The trees hardly dripped at all!  On Saturday we woke to a dusting of snow which was very pretty.  By noon, it was all melted away.  It was once again very cold and windy.  Clear blue skies.  I don't think it made it out of the thirties.  The trees didn't give forth one drop of sap.
     This morning I wanted to check to see if any of the sugar maples down by the creek were running at all.  Normally, I would have just waited till late afternoon and brought my collection bucket.  Good thing I checked!  The wind had blown two of the jugs off of the trees and there was the sap - drip, drip, dripping onto the ground. 
     At around three this afternoon I collected about three gallons of sap which is now boiling away on the stove.  I'm going to have to add the syrup that sugared to it once it boils down.  This will reconsitute the sugar crystals into syrup.  I think tomorrow will be a good day for sap to run.  It's supposed to go below freezing tonight, then sunny and 50 F tomorrow.

Saturday, February 25, 2012

Groundhog!


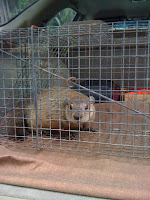
     Very disturbing.  As much as I like Punxsutawney Phil and Groundhog Day as well as the movie, I don't like to see a groundhog in my yard.  Yesterday as I was pulling in to the lane, I spied a very fat groundhog out by the old barn foundation.  It looked to me to be a pregnant female. 
     A groundhog, especially one that takes the kids out for breakfast lunch and supper, can devastate a garden in no time flat.  We had this problem two years ago.  My old dog, who died a couple of years ago, couldn't tolerate the sight of a groundhog.  He also liked to eat them.  The dog I have now doesn't usually go after them, but last year she did manage to take one out.  She doesn't eat them, however.  On the other hand, I have heard that a groundhog skin makes a good banjo head.  Maybe the next one she gets will end up on my banjo.
     We have trapped them in live cages and relocated the critters.  I'm going to set the live trap.  This coming year the price of food, on account of the price of gas, is sure to go sky high.  The yield from the garden will be very important to us and I'll be darned if I'm going to feed it to a groundhog.
     Mind you, I have no problem with Punxsutawney Phil.  He lives a couple hundred miles from our garden and is well fed by the people of Punxsy.  It's the rest of his ill bred kin that I don't much care for.

Friday, February 24, 2012

Slow day for Sap and Sugar Crystals in the Jar

     It did not go down to freezing last night.  Today hung in the high forties with a misty rain.  Very slow sap day.  I maybe got a quart of sap from six trees.  No matter, boiled it down anyways and added yesterdays partially boiled down three gallon take to it.  I netted about a cup of syrup.
     However, and this disturbs me, there is a lot of maple sugar at the bottom of the second quart jar I have.  I thought it was just minerals that precipitated out, but when I took the jar out of the refrigerator and took a good look at it, I realized it was sugar!  Not a disaster, mind you, sugar can be reconstituted into syrup.  But I just don't know where I went wrong.  Maybe boiled it a tad too long. 
     Professionals and people who rely on what pros say and do, take the temperature of the syrup as it boils.  When it hits 219 F degrees, it is taken off the stove.  I have tried using a candy thermometer, but find that it is hard for me to read.  The steam gets on the glass and as soon as I take it out so that I can read it, the temp starts to drop so I don't get a true reading.  Also, when there is only an inch of syrup in the bottom of the pan it's hard to keep the bottom of the thermometer off the metal.  This is why I have been relying on the bubble method of telling when it is ready as well as relying on when looks like syrup, feels like syrup (on my tongue,) smells like syrup, and tastes likes syrup - then it is a duck!  Just kidding.  Therefore, it must be syrup.
     I'll reconstitute the sugar this weekend.  So far, the first quart looks fine.  It's a nice amber color. Nice and clear.  Minerals at the bottom of the jar.
     We have a cold front coming in tonight.  I'm curious to see how the trees will react to this.  I really like my trees.   

Thursday, February 23, 2012

The Mathematics of Sap to Syrup: Is It Worth It?


     In a good year it takes about 40 gallons of maple sap to make one gallon of maple syrup.  There are 64 ounces in a gallon.  Using this ratio that means that one gallon of sap will net you about 6.4 ounces of syrup.  That's a little more than 2/3 of a cup.  I don't know how much that costs in electricty.  I suspect it costs something, but I haven't figured that into it yet.  Last year when I boiled enough sap to make 1.25 gallons of syrup our electric bill did not increase.  However, I took great pains during that time to turn off anything electric that we didn't need on.  Lights.  TV.  Other.  I also employed the top of our pellet stove to heat the sap to warm before pouring it into the pot on the stove top.
     Now let's get back to that one gallon of sap.  If you boil down one gallon and end up with 2/3 of a cup you run the great risk of burning the syrup to the bottom of the pot.  It's best to have at least three gallons to boil down to syrup.  When I only have a little bit of sap, I only boil it down partway.  It's not syrup at that point, but has genrally taken on an amber color and tastes pretty sweet already.  I let that cool, pour it off into a Mason jar and stick it in the refrigerator.  The next time I boil sap down, I add this too it.  This way enough is in the pot so that it can be boiled to syrup stage without being so little that it burns to the bottom of the pot.
      If there would be a day when the sap is flowing like crazy and it would mean 24/7 in the kitchen boiling sap, I would (and did, last year) fire up the wood stove that sits in our yard.  Last year I burned scrap wood in it, but this year we have a birch tree all chopped down, cut up and ready for splitting and building a fire.
     Is it worth it and why do I bother?  This question has been posed to me by several people and I am going to wax a little philosophical here.  Is art worth the effort?  Seriously, consider all the time and effort that an artist takes to learn a craft and then create a work.  Will that artist (I include musicians here) ever see all the time spent come back as cash money?  Is money earned or not spent, the only thing that makes any work worth doing?  And syrup of all things.  We're going to eat that.  It's not even like it will hang on a wall somewhere or be recorded for generations to come.  So why bother?
     I bother doing this because it is the season of sugar.  The year goes round, the earth gives us her stuff, and this is the season to get sugar from the maple trees.  I also happen to like the taste of real maple syrup.  I suppose I could just go to the grocery store and buy some, but there stand the trees - all full of sap and ready to give us some.
      In the time it took me to write this, the sap I collected this morning has pretty much boiled down to where I'm going to pour this off into a quart jar and save for later to add to another batch.  Not much sap this morning.  Although it will be very warm today - 60 F - it did not go down to freezing last night so the trees are running slowly.  Also, the Norway Maple that I had two taps in has now budded.  I'll be plugging up those holes today and moving the jugs down to the sugar maples by the creek.  

Wednesday, February 22, 2012

Pancake Tuesday!

     Some call it Mardi Gras, Some call it Fat Tuesday, some call it Fasnacht, but at home in upstate New York, when I was a kid we called it Pancake Tuesday.  As part of a Lenten tradition the day before Ash Wednesday was a day of feasting.  It was also the day we got to have breakfast for supper!  Pancakes!  Sometimes with sausages; sometimes with bacon.
     As the mother of seven kids, Mom spent a lot of time at the stove that evening flipping pancakes while we sat at the kitchen table and gobbled them up.  Butter.  Sour cream in big globs.  And Maple syrup poured in great streams onto pancake after pancake.  We were hungry kids!
     My Dad tapped our great big maple tree - the one in the backyard, the oldest tree in town - and netted just enough maple syrup for our feast.  He would stay up all night while it boiled to a syrup on our kitchen stove.  Our windows would be covered in steam.  The cupboard doors would warp and the ceiling tiles would arch.  So what?  It was sugar time!
     It occurs to me that one of the reasons why the people of upstate New York call Shrove Tuesday, "Pancake Tuesday," is because that is the season of maple syrup - sugar! - and a most welcome feast for the people of the north country who still have a ways to go before spring.

Here's my recipe for homemade pancakes (I never use a mix - not even Bisquik)
1 C flour
3 T fat of some sort (Lard, butter, oil...)
3 t baking powder
1/2 t salt
1 fresh egg from a happy chicken
1 C milk.
Blend flour, baking powder and salt.  Cut in fat.  Add egg and milk.  Stir but not too much.  You want it lumpy.  Fry in a fairly hot frying pan that has been greased with fat (I use bacon drippings)

Great day to do the wash AND boil sap!

     The temperature is going into the fifties today and there is a stiff breeze blowing.  It's a great day to do the wash and hang it outside to dry.
     I plugged up the silver maple that is in our front yard because it has budded.  This particular maple tree always buds early.  Its sap now smells woody.  Time for me to quit pestering that tree and let it do its thing and let it get on to leafing out.  However, the sugar maples that are down by the creek generally bud late, not for a couple weeks yet as long as cold nights hold out for a spell.  I tapped three more trees down there and already the jugs each have about a quart of sap in them.
     I will be boiling sap again tonight (already boiled down two gallons this morning) as well as working on re-writes of my novel.  Oh, I'll also be folding laundry.
     So far I have a quart and a half of syrup in the refrigerator. 

My chickens drive me insane!

     Okay, so here's how it goes.  For the past whatever many years that I've had chickens, in the winter I have had to supliment their free-running feeding with crack corn and mash to keep them happy.  And they are.  The price of this suppliment has increased greatly to around $12 for 50 pounds.  So my hens are giving us six eggs a day.  I've pickled and frozen them but that's still way more than we'd eat in a month of Sundays.  So I found some buyers for great eggs from happy, free-running, sometimes supplimented chickens which should at least cover the cost of the extra feed.  I sell thenm for $1 a dozen - way less that the gorcedy store sells their eggs from not so happy chickens.  But sure enough.  I get buyers sell eggs for two weeks and now the hens get broody.  Now they just want to sit on their eggs.  Well, I wasn't born yesterday and I could see that one coming up Sixth Avenue.
     I'll mark one or two eggs with a magic marker and let the hens sit and hatch those but will snatch any other newbies from the nest.

Tuesday, February 21, 2012

Not much sap then OMG!

     For the past couple days the trees have been slow.  It went to freezing at night, then only low forties during the day.  Sunny, but still cool.  So today at 3 pm I checked jugs.  I didn't have more than two gallons from five trees in 24 hours.  Checked at 5:30 pm - another GALLON!  What's up, trees!  You sure have started flowing.  So I am boiling down what I have on the kitchen stove top and expect tomarrow to be a busy day boiling. I will be tethered to the kitchen.  It's okay, though.  I am reworking a novel that I wrote.
     I am a slow typist - eight words a minute - and spent the past week boiling sap and retyping this novel from hard copy onto my computer so that it could be saved in cyberspace as well as edited in Word.
     Multi-tasking.  If I must be tethered to the kitchen, I might as well be productive.  I'll let you know how it goes with the novel as well as with the syrup.  The novel has nothing to do with making maple syrup.

Thursday, February 16, 2012

A Watched Pot Does Indeed Boil!

     When I boil down sap for maple syrup I boil it in my kitchen on my stove top.  I use a heavy weight stainless steel six quart dutch oven.  I set the burner at high till it starts to boil, then turn the heat back just a bit to medium high.  As the water boils off, I add more sap from a large kettle that sets on top of the pellet stove in our kitchen.  This doesn't boil the sap.  It just heats it, takes the chill off of it.
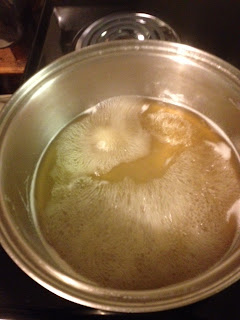
     At first the sap boils rapidly and with pretty big bubbles.  It looks like water boiling.

As the sap boils down, more sugar to water than what it started out as, the bubbles start to get smaller. It also starts to taste sweeter.

     I've never used a candy thermometer when boiling down sap for syrup.  I suppose I could but I can't be bothered with that.  I do this the same as my father did back when I was a kid growing up in upstate New York and he would tap our maple tree to make syrup.  All that sap boiling and steam in the kitchen used to warp our cupboard doors and coat the windows.  I crack a window near the stove so that helps out some.  But be prepared for a steamy kitchen.  Also, don't run off and think you have time to go get involved in something else, something that will take you too far from the kitchen.  You need to keep an eye on the sap as it starts to boil down.
     After I have used up all the sap from the big pot on the pellet stove, the sap on the kitchen stove starts to boil down in earnest.  All this time I have been skimming off the foam that collects near the sides of the pan.  These are minerals, etc.  No reason to keep all that foam there.
     Soon enough the bubbles on the top of the sap start to group up and foam toward the middle of the pot.  Taste it again.  It tastes even sweeter!  Careful you don't burn your tongue.  At this point I watch the pot very carefully.  Sap, as soon as it hits that critical temperature when it turns from watery sweet stuff to syrup, can get away from you really quickly.  I cut the heat back just a bit.  The bubbles go back to bigger.  When they get smaller again, I cut back the heat just a little more.  Taste it again.  I watch how it hangs on the spoon.  If it coats the spoon and drips off slowly in big drops I pronounce it done.  I remove the pot from the burner, let it cool down just enough so I can taste it without burning my tongue, then pour it off into a Mason jar that has been filled with hot water (pour that water out) and sitting on the kitchen counter.
     Next day, same thing and I add the new syrup to the old syrup.  If there is a day when I will not get so much syrup out of what had been gathered and to boil it down to syrup stage would have left too little in the pot to control the boiling, I don't boil it down to syrup, but save the partway stuff off in a jar and add that to the next day's batch.
     This method of pot watching has worked out for me for quite a few years.

Tuesday, February 14, 2012

Cheap Maple Tree Taps

     I needed a few more taps for the trees down by the creek so went to Coles Hardware Store in town.  I like Coles.  It's like an old fashioned hardware store, great customer service, and you can wander around and take your time to look at things while creating a project in your mind.  When I told the salesclerk what I was doing - tapping maple trees - she brought out some bonafied cast aluminum taps.  Not good for me!  They were $4.99 a piece and I don't want to boil down the $100 gallon of syrup any more than do I want to grow the $200 tomato in the summer.  We looked through plumbing parts and found this:


         The plastic tubing fits over the threaded end and the wedged section fits into a 3/8" hole drilled into the tree.  The tube is directed into a water jug.  If you're going to use a jug make sure it has only had water in it.  Not milk.  Even the slightest bit of fat residue left over from milk could taint your sap.  This arrangment of plumbing part and tube cost less than $2.
         I went down to the creek, drilled the hole in the tree and before I was even done drilling, the sap was flowing.  More boiling tonight!

Monday, February 13, 2012

Sugar Time!

     It's SUGAR TIME!

     This winter in central Pennsylvania has been unseasonably warm.  I wondered if I should have tapped the maple trees in January.  We had many days when the daytime hit over 50 and it went down to freezing at night.  That's prime maple tapping weather.  But I looked on the Internet to see if tapping trees in January was wise.  Normally we don't tap till mid February in Pennsylvania.  I found some information that made me put off tapping the trees.  What I found said that if we would have a cold spell trees tapped too early might start to heal over.  I didn't know if that was true or not.  A lot of stuff on the net is not.  But some is.  So I held off.  Just the same, yesterday our local paper ran an article about a man who said this was a banner year for sugar - maple sugar.  He started tapping in January.  I slapped down the paper and headed outside - drill in hand.  Tapware lined up.

     To tap a tree I use a hand drill with a 1/2" bit.  I drill into the maple tree about 3 feet up from the ground and at a slight upward angle.  This is so that the sap that runs out will run down.  I drill in about two inches.  I have some bonfide metal maple taps and a few plumbers' elbows from the hardware store.  Either type works.  Drill the hole and hammer in the tap. From the hardware store I have some plastic tubing that is then fit over the end of each tap.  This is directed into the empty water jug (a plastic gallon jug) that has been affixed to the tree with a nail and some pipe cleaner.  Twist ties will work but make sure they're sturdy.  A gallon of sap weighs a lot.
     I didn't think sap would run much today.  We had a cold snap.  But sure enough today I gathered up a gallon of sap from two maple trees.  One is a large sugar maple and the other is a red maple.  Any kind of maple tree will deliver sap but some types have more sugar than others. On the other hand, some of the maple trees bud later than others, so I guess it works out even in the end for how much syrup you get.
     The gallon of sap will only make a little bit of syrup.  So here's how I keep up with it.  I boiled the sap on the stove top while cooking dinner.  It took about two hours to boil down o where it had just started to take on a slight amber color.  The bubbles were also smaller than a full boil water bubble.  I let it cool.  Poured it off into a quart Mason jar, put a lid on it and stuck it in the refrigerator.  Tomorrow, I'll do the same.