Bev's Tip Jar - Thanks for your support!

This is my Tip Jar. If you enjoy reading this blog and would like to support my cooking, eating and writing habit this is how to do that. Thanks for your support!

Monday, April 9, 2012

Behold! The Extremely Tasty Dandelion Blossom!

     Once you have tried this recipe you will never again run off to the hardware store for a bag of Scott’s Dandelion killer. You will also realize how short the dandelion season actually is. It only lasts about three weeks with a short spell come September with its cool rains.
     When I lived up north, north of Pennsylvania in upstate New York, the Italian ladies would gather dandelion leaves, sauté them with olive oil and garlic, then marinate them in a blend of seasonings and vinegar. They’d pack them in a jar in the refrigerator and serve them as garnishes.
     I moved south(ward) to Pennsylvania and found that the people around here gather the same leaves, douse them with hot vinegar and bacon dressing, or throw them into a ham soup and eat them that way.
However, and I got this out of a Native American Cookbook I picked up at the Rez many years ago, the blossom itself can also be eaten. Who would think?
     I tried this recipe when my kids were very young and not into vegetables. At a point, as kids are growing up, they become suspicious of anything green or orange when it comes to eating. This suspicion is common among children. Supposedly, it helps them learn what is safe and what isn’t.  Until they see other people (like parents) eating orange and green things a great many times and not keeling over, they stay away from vegetables.
     However, the night I served dandelion blossom, breaded and fried - they gobbled them up! No questions asked. No suspicious glances in our direction wondering if we were going to fall off our chairs writhing in pain. They just ate them. And asked for more. Whoa! I thought. Are we evolved from cows? Rabbits? Dandelion greens and blossoms are loaded with vitamins and supposedly (and I did look this up many years ago) you can eat a LOT of blossom and not get sick. You can’t overload. We figure about a dozen to a serving. So here goes:

     Fried Dandelion Blossom

-Gather dandelion flower heads preferably away from the road.

-Set out two bowls - one with one egg and one tablespoon of water added, mixed in.

-Set out another bowl with anything for breading: flour with salt and pepper, Italian style bread crumbs and some flour, flour, bread crumbs - doesn’t matter. Whatever you have.

-Rinse the colander full of blossom in water. Not because they are necessarily dirty, but I found that the water helps them steam soft within the breading. Otherwise they have a fuzzy texture to the tongue which I don’t find pleasant.

-Dip the flattened out blossom in the egg.

-Flatten out the blossom and dip it into the breading mixture.

-Fry in oil, olive oil, butter and oil - whatever - till golden brown on the blossom side then flip and let it fry some on the stem side.

-That’s it!

     Sometimes I add chopped chives or spring onion, both of which come up around the same time as do the blossoms blossom.
     I have to admit, I get a kick out of Scott’s Lawn Care ads that show up on TV and in newspaper flyers and show a suburban homeowner so distressed over all those damn dandelions on the lawn. So Scott’s says “Use this and it will kill them all!” Right. For all I know they could be sprinkling the lawn with flour because dandelion blossoms only bloom for about three weeks in the spring when the weather is cool and rainy. Sprinkle your lawn with The Dandelion Killer and sure, they'll disappear - they’ll be gone in a couple of weeks anyway.  To everything there is a season.

     But I will tell you this for a brass fact, once you start frying up the blossom you’ll be sorry to see them go. They’re blooming now! Go get ’em!

PS - I'll lay a dime to dollar that a bunch of Scott's Lawn Care ads show up on this page and will tell you to contact them if you have a dandelion problem.  Go ahead - contact them - and give them this recipe.  Maybe next year they'll be telling us how to grow dandelions.

PPS - Because the dandelion season is so short it is possible to bread them and freeze them for later.  Just lay them out on a paper towel on a cookie sheet and set them in the freezer.  Once frozen, dump them into a freezer bag.  They taste just as good as fresh when fried and actually make for easy cooking this way.  I wonder when we'll see them at the grocery store done up like this. 

Monday, April 2, 2012

An Experiment in Growing Garlic

     Every year that I have planted tomatoes I’ve made spaghetti sauce and either canned or frozen it. Over the years, as I became a better gardener, more and more homegrown elements such as onions, chives, green peppers, oregano, basil, and parsley were added to the sauce. Last summer as I pealed, chopped, grinded and minced, I realized that the only element that was store bought (other than the olive oil) was the garlic! This year I am going to try to grow garlic.
     Ideally garlic should be planted in the fall or at least very early spring. I planted the garlic cloves last November.
     Find a nice sunny spot in your garden that is not too damp. Garlic likes dry weather and soil. To grow garlic dig up a strip of garden about a foot deep. Get some garlic from the grocery store and break it apart into cloves. Plant each clove about 1” to 2” deep under the surface, pointy side up. Set the cloves about 4” apart with rows about 18” apart. I think mine are a foot apart but it’s too late now to move them. Mulch with straw. Then let it go.
I mulched mine in the fall with straw from the chicken coop.  It had chicken droppings in it.   The garlic sprouts were about 4” high this February because of our mild winter. It got really cold some nights but that didn’t seem to hurt the sprouts.
     Now the weather is warming up so I have cleaned off the garlic bed and fertilized it with liquid manure. Garlic likes a slightly acidic soil so for the summer mulch I used wood pellets. We have a pellet stove and every now and then we open a bag and find that moisture has gotten into the pellets and they can’t be used in the stove. I use these pellets to mulch areas of the yard and garden that like acid soil.  For instance, the red raspberry bedd likes an acidic soil, so that is mulched with wood pellets.
     So there you have it! The garlic is now taking off. It’s about a foot high and fertilized and mulched. As it grows you're supposed to clip off the flower stem that may emerge.  This aids in adding strength to the root, the bulb, which is the part you eat.  I’ll see how it goes and keep you posted.

Friday, March 16, 2012

Seasonal Food from Eating with Bev: How to Seal a Maple Tree Tap Hole

Seasonal Food from Eating with Bev: How to Seal a Maple Tree Tap Hole:       The daytime temperature has climbed into the 70's and the nighttime temperatures are now hanging in the 50's. It's unseasonably warm ...

How to Seal a Maple Tree Tap Hole


     The daytime temperature has climbed into the 70's and the nighttime temperatures are now hanging in the 50's. It's unseasonably warm and this weather will stay with us for the next couple weeks - maybe longer! All of our maple trees have budded and they are no longer dripping sap. They are busy growing out their leaves now. It is important to seal the holes that were drilled into the trees otherwise bugs and disease can get into the tree and kill it. We can't let that happen.
     The best way to close up a tap hole in a maple tree is to find a maple twig that is about the same size as the hole drilled. You could run to the hardware store and get a bunch of dowel rods to cut up, but twigs are nature's dowels and they are conveniently located right near the tree's that you've tapped! Cut off a piece of twig about four inches long and pound it into the hole. Remember, the hole was drilled about 2" deep so about 2" of twig will poke out. If you find that the twig you cut is too thin (loose) use a piece from further up the twig branch. Nature provides us with tapered twigs, so soon enough you'll find a piece that fits snuggly. It can be somewhat forced into the tap hole by using a hammer. If it's too big, just find another piece or try turning it around.
     Because I use a nail in the tree on which to hang the jug, I also plug the nail hole with a small piece of twig. The tree will heal over and next year you'll find that the tap hole is sealed. You won't be able to remove the twig that was used to seal the hole. Nature is marvelous. Your trees will thank you for treating them well and with consideration. Next year, just find a different spot to drill.
     One way to tell if a tree is ready to be sealed is to look at the color of the sap in the jug. This is also one reason why I prefer to use plastic water jugs for home tapping. It's much easier to see #1 how much sap you got and also if it's clear or starting to turn dark amber in color. Once it turns dark amber there won't be as much sugar in the sap and it will not taste very good. It will taste woody or "buddy."

Monday, March 12, 2012


     The old meat grinder raised some eyebrows today when I took it out to Hilsher's General Store for advice. One, I needed to get a set of the right size stuffing tubes so to make sausages at some point and two, I wanted to get the blades sharpened or replaced.
     Dick Hilsher saw me wandering around the store carrying this heavier-than-lead meat grinder and asked if I needed help. He is usually there and is very helpful answering questions and finding you the right parts to get most projects underway.
     "Hm! Do you know what you have here?" Well, an old meat grinder. He asked me how long I'd had it and I said, "Couple days." Then he pointed to the patent date on it - 1909 - and told me all about the company in that used to make such meat grinders. Landers, Frary and Clark out of New Britain, Connecticut. It's a nice heavy duty Universal Meat Chopper. Cast iron. Still works but needed some attention.
     He brought me over to the display case of grinding blades and parts. "It's locked," he said. "The only thing around here that I do lock up." The blades were not cheap but not horribly expensive either. He had me feel a new blade and compare it to the feel of the blade on my meat grinder. There was a noticeable difference in sharpness. I would have bought a new set of blades - cutter which looks like a small propeller and grinding plate - a disk full of holes - but because my meat grinder is so old, the "square" hole of the new ones would not fit on the "rectangular" shaft of my old one.
     So we sent both blade and grinding plate off to the shop to be sharpened. He said when they get back they should be sharp enough to last me the rest of my life. (I'm not sure how much longer that will be, but it's good to know.)
    
     On Saturday Greg and I went up to Lewisburg, PA to the Dale Walker Engle House to see a demonstration on how to make sausage. They had a guy up there showing how to make maple syrup as well, but I pretty much know how to do that. The sausage demonstration was worthwhile. I got to ask lots of questions and as well learned how to do it.
     Questions: What's that gadget? That's the thing that keeps the auger centered when the blade is taken off and the sausage tubes added. Why do they say on the Internet to soak the casings in water? To make the stuffing go through more easily. Why do they say on the Internet to let the sausages rest for a day? To help set the filling. Should I use soy flour in the mix? Only for bologna. Where did those casings come from? A pig. What about for smaller link sausages, like breakfast sausage? A lamb. How about...? A steer. I didn't ask him if I could recycle gut fiddle strings for casings. That might have been out of his range of knowledge.
They added a mix of salt and pepper - about a 1 to 1 ratio and I'd guess about a 1/2 cup of each to about 10 pounds of meat. He said to only use good grade pork for pork sausage, a decent shoulder.
    
     While at Hilsher's I picked up a pound or so of spring onion sets and a package of Snow Pea seeds. It's that time of year. Yesterday I realized that the little green plants in the cold frame I'd set up in the fall are not lettuce plants, but weeds. I'll be replanting lettuce seeds today and try to get some chicken manure from the coop onto the garden. Tomorrow I'll be planting onions.
     They always say around here to get your peas planted by St. Patrick's Day which is this Saturday. Twenty years ago I used to try to do that but March would be so cold and snowy as well as the first half of April that the seeds would just rot. So we'd replant. Then May would get so warm that that the plants would be over before they started. Never any success with planting peas by St. Pat's Day. However, because of the mild weather we've been having I'm going to try it again this year - one more time - and see what happens.
     The grinding blades should be back in about two weeks. Just in time for Easter. Just in time for fresh kielbasa - I hope.

Wednesday, March 7, 2012

Sausages, Sap and Beer!


     Busy day yesterday. As I promised when I began this Blog I intend to write about moving through the seasons and the food of those seasons. Though it's not over yet, we are beginning to move out of maple sugar season now and into spring, albeit, slowly.
     Maple season moves us toward Easter. One of my favorite meals is the Easter family dinner. As part of our Easter tradition we usually take a trip out to Shamokin, PA where we drive by our late grandparents' old house, late aunts’ houses and finish the day by stopping into Shaw’s Meat and Deli Market. We buy kielbasa there - about twenty pounds, enough to last us for Easter dinner and the rest of the year. We would also buy City Chicken there. This is chunks of veal and pork on a skewer that you bring home, then bread and fry like chicken. We’d also buy Soupis - a hard Italian salami. This was our eastern European meat for the year, some of which we gobbled up right away, some for special dinners and some for freezing and to save for later.
     The floods of 2011 hit Shamokin, PA and the rest of central Pennsylvania pretty hard. Bad news! Shaw’s couldn’t recover their losses and closed down. Bummer! Now - where to get good kielbasa?
     I decided I would try my hand at making our own. So yesterday I went out to the Kramer Flea Market in search of a hand meat grinder with a sausage tube attachment. One of the dealers there had about a dozen hanging on the wall but when I asked the prices he started in with a song and dance about how this was hog butchering time and everybody wanted one (I doubted that because I was the only one looking at them for a good hour although the market was very busy)  When I asked him the prices on a few, he started in with another song and dance about how they were "antiques and collectable."  Since I don't necessarily want to collect meat grinders, I just want one that works, I thanked him nicely and went down to the Firehouse Flea Market in Selinsgrove. I got a decent one for $15.00, the first in my 'collection.'     Mrs. Stolfus, who takes the money at the flea market, said if I go out to Stauffer’s Meat Market (out in the hills) they’d have casings and that Hilscher’s Ace Hardware Store (deals with the farmers and Amish, etc) would have proper sausage tube attachments and anything else I needed to make sausage - kielbasa!         
     Stauffer’s makes really good cracklings and if you’re lucky and get there early on a Tuesday when they render the lard, you can get a decent sized block for $2.00. So I will, probably next week.
     So now I have a meat grinder that needs to be cleaned sitting on the kitchen table. James, our son, is home this week from NYC and I took advantage of his good and helpful nature to help me get some beer started. We make out own beer on account of James having taken up the hobby while he was in college at the school right down the road. Once you start making your own beer you get spoiled. Store bought just never quite cuts it when you can tweak a recipe to your own individual taste buds.
     A family favorite is the Shakemantle Ginger Ale recipe from BEER CAPTURED a book by Tess and Mark Szamatulski. It takes about seven weeks start to finish to make beer. We’ve done this many times now and if we get the ginger beer started now, it will be ready for just about the time to start mowing the lawn again.
     So beer boiled on the stove for a good part of the afternoon, till it was time to pour it - all five gallons - yes, you heard me right - all five gallons! into the primary fermenter. Then I went down to the creek to collect the maple sap.
     The day’s take was low, about a gallon, but that boiled down and added into the previous days’ take gave us about a pint. Today, however, was great! A good three gallons of sap. Last night went to below freezing and today up to 60F. Excellent sap drip weather. I think next week will be the end of it here for us, but so far I have just shy of a gallon of maple syrup in the refrigerator.
     I’m hoping to make the sausages using some of the venison from the deer I got in the fall. For James’ birthday dinner we had a fine, rolled rump roast of venison, marinated for several days in Merlot wine, garlic and herbs. I would tell about how I got that buck in this post, but spring is not the time to tell about how you got your buck. But as I think, just over the horizon of maple sugar season, and Easter kielbasa season, and ginger beer season is Spring Gobbler season. Let’s hope I have story to tell about that!


Sunday, March 4, 2012

Budded or Not - When to Stop Tapping Maple Trees

     This year, 2012, has been unseasonably warm for winter.  It's almost time to stop tapping the maple trees though there may be another week left from the looks of the weather.  I could kick myself around the proverbial block for not setting the taps in the trees in January.  January was ideal sugar weather - days in the fifties and night in the twenties.  I did not tap the trees, however, because there was always the risk that our winter here in the Northeast U.S. would have finally come in full force.  The trees might have stopped running and the taps holes might have started to heal over.  So I waited until mid Frebruary, the time we usually tap trees in Pennsylvania.
     So far I have three quarts of maple syrup in the refrigerator.  It will keep for a year or more if refrigerated.  We don't usually have to think about that too much, though, becauese we use it up.
     We have several varieties of maples trees on our property - some better than others for syrup, but they all drip sap and all that sap is good when boiled down.  Unfortunately, I haven't really paid attention to the types of trees we have.  This summer when the leaves are on, I'll come back and edit this post with the names of the types of maples we have.  But here is what I know on observation for how they give sap, when they bud and when it is time to pull the taps and plug the holes.
This tree on the right hand side of this article, sits in the front corner of our yard.  It's always the first to bud.  It actually started looking "nervous" in January but it always gives the sweetest sap - tastes sweet right out of the tree - so I tapped it anyway.  By March 1, 2012, the buds had started to open.  I had pulled the taps the week before.  Also, the sap it put forth was taking on an amberish tint.  When that happens I always pull the taps.  The syrup would not taste sweet then.  It would taste woody or "buddy" as the pros call it.
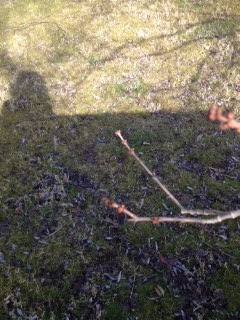
     The tree branch pictured at the left has just started showing some buds.  It's dripping very slowly now.  It gives a decent sap, not so sweet as the front yard tree, the one that buds early, but earlier than the trees down by the creek.  It's still running clear sap, but had slowed down considerably.  I'll probably pull the tap on this one tomorrow.
     The trees down by the creek are still dripping sap and have not budded, nor do they show signs of budding yet.  These may hold out for the rest of the week.  We still have days in the fifties predicted with cold nights.  I might be able to get another quart out of them.
     This year would have been a banner year for syrup had I tapped in January.  I feel like the calander is slipping sideways.  Maybe it's better just to stand outside, feel the air and the sun, and be more instinctive about tapping trees than to watch the calendar these days.
     Anyways, I'll be boiling some sap down tonight - I just don't know how much.